Now I have furniture for my library I set out to make the walls of my room. While vacationing in England I visited some fabulous old buildings which gave me a few ideas. I wanted some windows, and french doors onto the garden, and having seen a lot of stained glass windows in England, I had to try my hand at creating my own stained glass look.

I used thin plexiglass for the window panes - because it’s like glass, right? I traced a pattern with a black acrylic paint pen onto them, then colored the pattern with more acrylic pens. This worked very well.

I placed the windows in a foam board “wall” and built some window frames and sill out of strips of foam board.
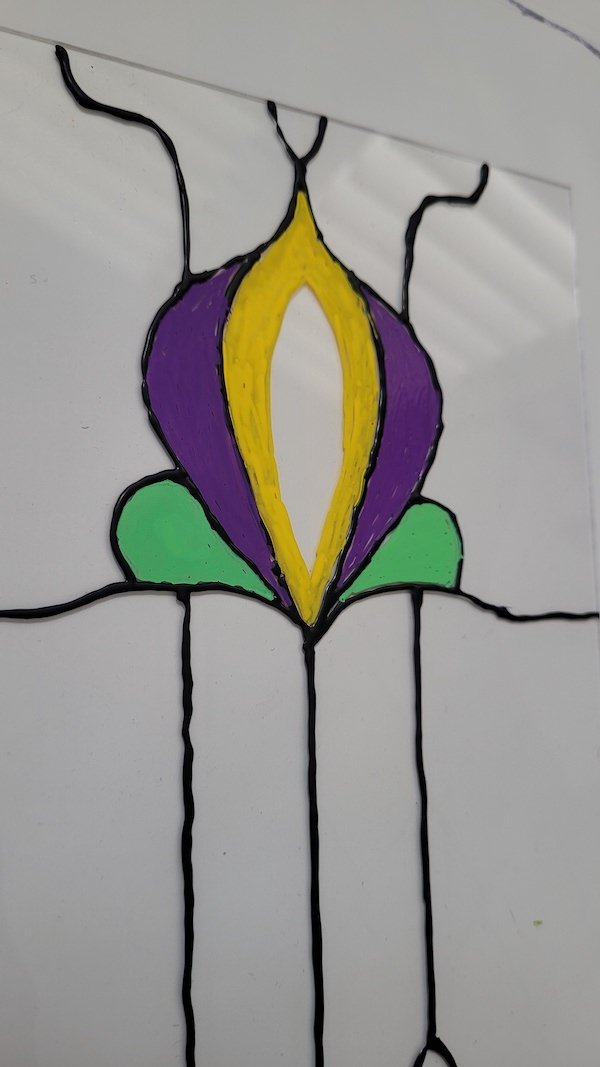
I used the same procedure for the french doors. I cut a frame into the foam board for each door, making sure the paper on the back stayed intact along the inner edge so that I could hinge them open. For the stained glass effect this time I found a little bottle of “Gallery glass Leading” and tried that. It gives a more realistic effect than the acrylic pen as it’s three dimensional, but it’s tricky to get straight lines as you have to squeeze the bottle as you draw with it. Anyway, as the pattern was not complicated I persevered and put the resulting stained glass windows into the foam board doors.

For the windows next to the french doors I went back to my stash of overhead transparency film (remember that from my apothecary shoppe window) and tried making the windows with that. It actually worked really well. The bottle of glass leading was too tricky so I didn’t bother with that. The acrylic pens worked perfectly on the film, so I could have saved myself a lot of time and expense by using that for the other windows and doors. Oh well, live and learn….
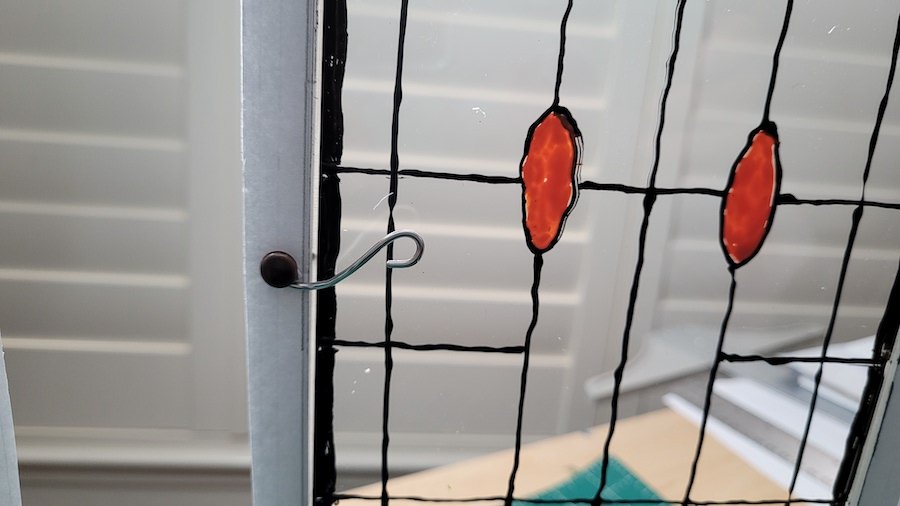
I made some door handles with Paper brads and wire, the same as on my book case cupboards.

Ta da! Finished look - I want these in my house!
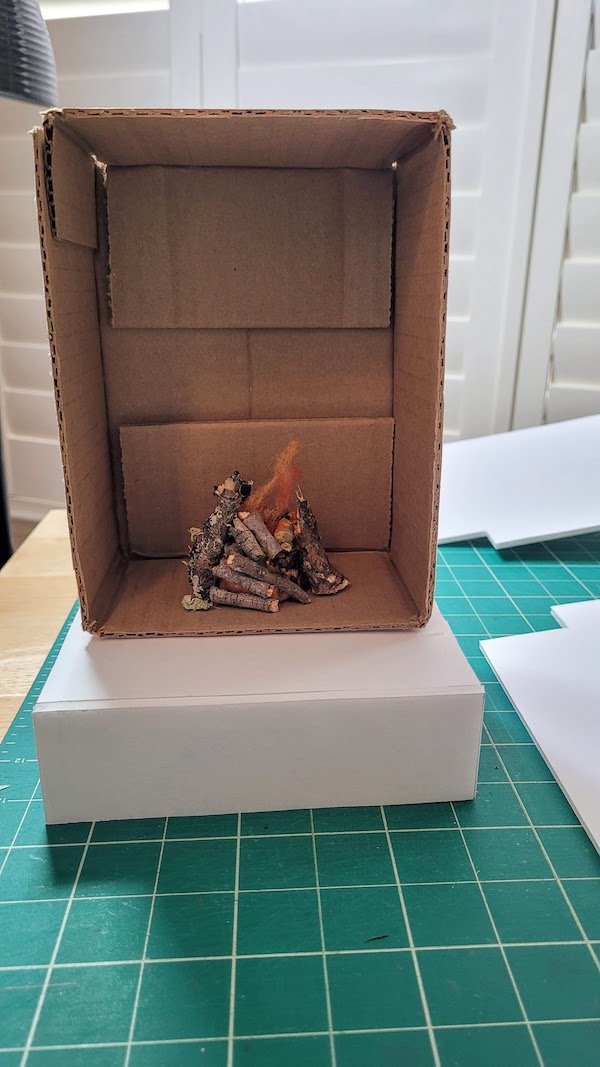
On one of my room walls I wanted a fireplace. I used a small box to make the back of the fireplace so that I could place my light up logs inside it. It doesn’t look very exciting at the moment, but wait…
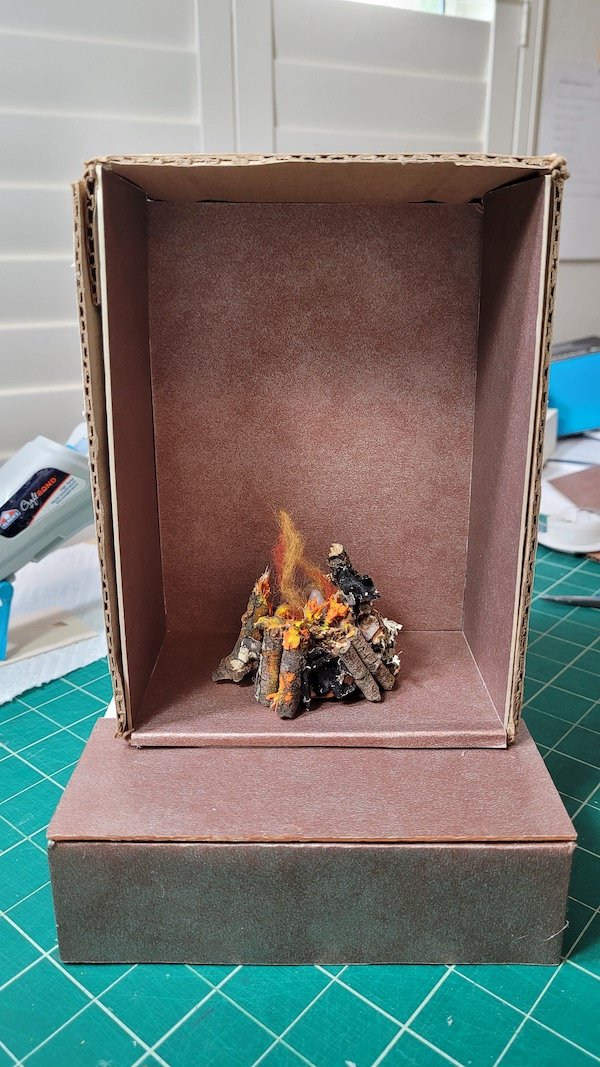
I lined the box with some fancy matboard and then built a foam board wall to surround it.

On to that I added more of the matboard and some strips of foam board as a mantle. I also added some short pieces of doweling as decor either side of the fireplace which ties into the wood used in the book cupboards. I later painted that white.
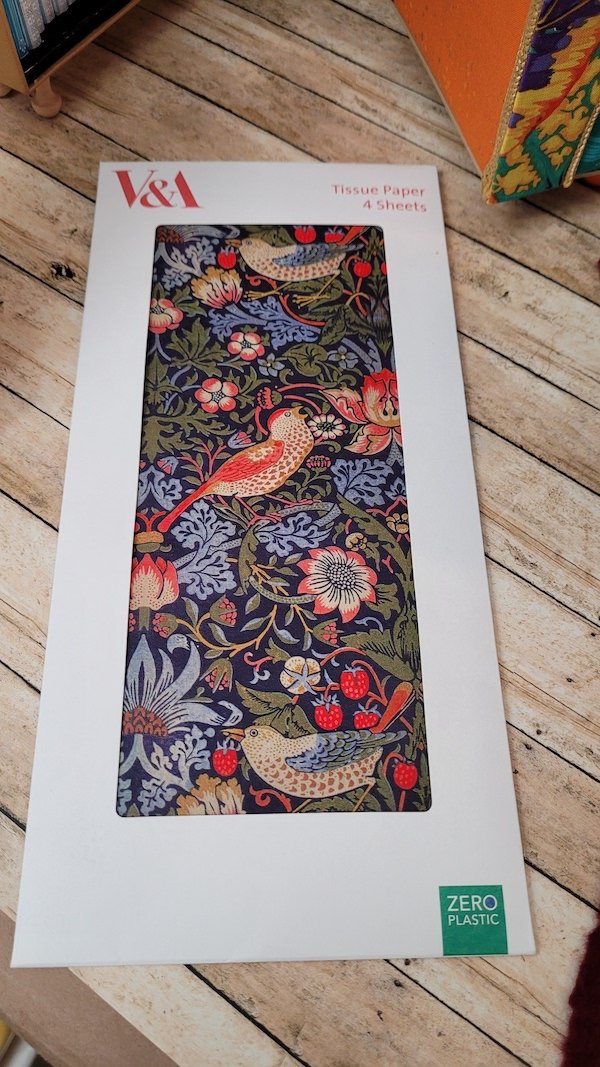
At a place called Winterbourne Gardens in England the house had lovely floral wallpaper in some of the bedrooms and in the gift shop I picked up some fabulous tissue paper which has a Wm. Morris pattern on it. I knew I would find a use for that in my library room!

Above the mantle I defined a space with foam board and glued some of the tissue into it. Suddenly I was even more in love with the tissue paper!

Here I experimented with placing my furniture into my room to see how it would look. The footprint of the room is 25 1/2 inches x 27 inches. Walls are 20 inches high. I used some scrapbooking paper with a wood pattern for the floor. At first I liked the white plain walls, but thinking back to all the lovely rooms I had seen in England it needed a little something more.

I tried some options for wallpaper…

… But in the end decided I loved the tissue paper so much I wanted it on every wall. Fortunately there were 4 sheets of tissue paper, and knowing I had large expanses of window/doors on two walls I went ahead. The biggest problem was how to apply the tissue paper as it is obviously very delicate. I started out using white glue. But this was awful as the tissue paper stuck in places I didn’t want it, and it tore if I tried to move it. It also wrinkled in a very disappointing way. I tried double sided tape, which was okay, but I quickly ran out of that.
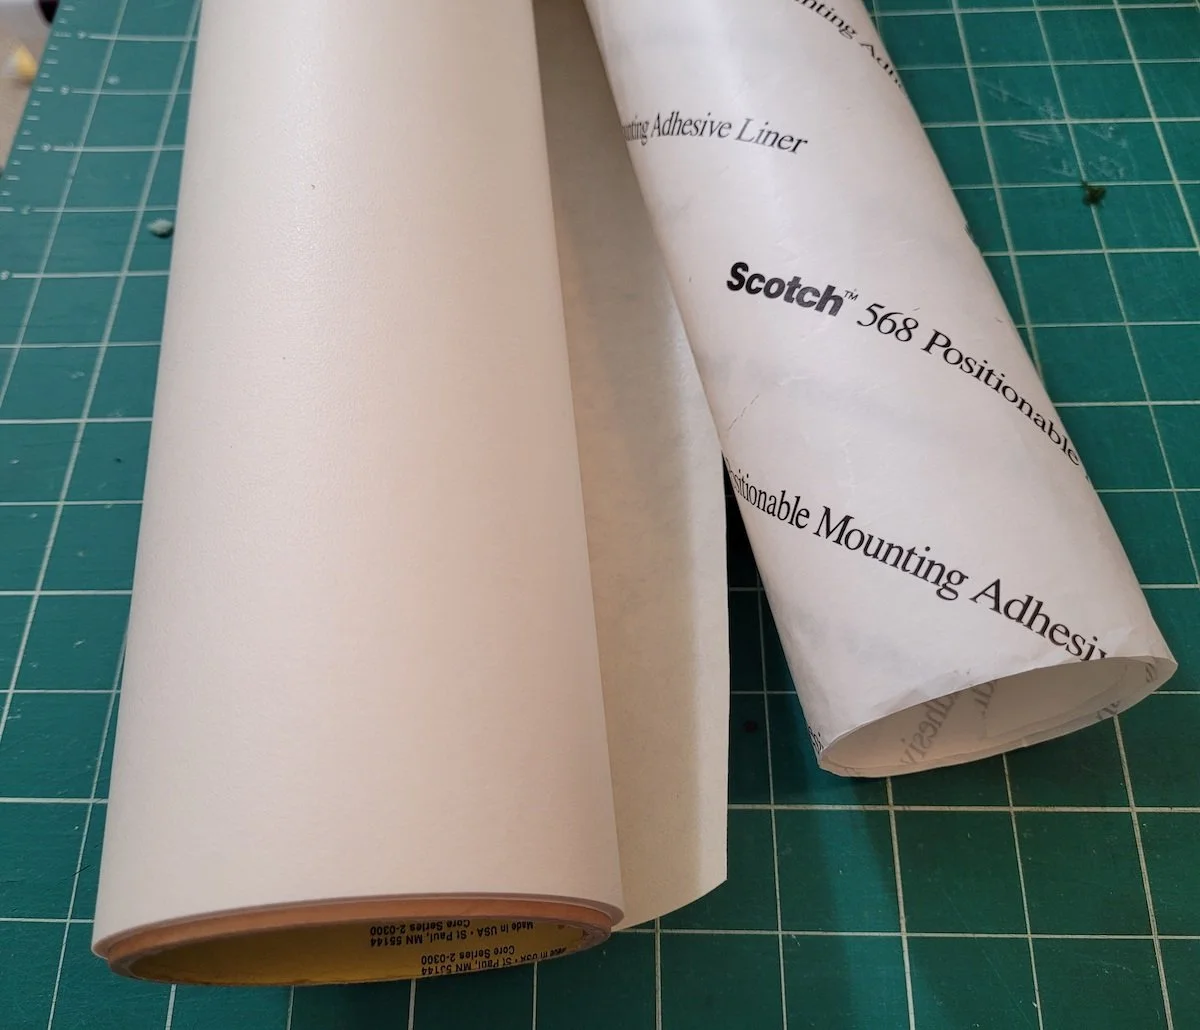
From the depths of my craft supplies I remembered this Scotch mounting adhesive which I had used waaay back in college. I had a huge roll of the stuff and was able to apply it to the back of the tissue paper and then glue that to the walls with greater ease. It was still a very fiddly process, and working around the window sills and doors was a nightmare, but eventually the “wallpaper” was hung on every wall!

Here’s a closeup showing the foam board window frames/ledges. I cut foam board for baseboards along the base of every wall. I had used white glue for the tissue paper on this section so you can see how wrinkled it got.

Here is a closeup of the foam board molding along the top of each wall. By layering different widths of foam board strips you can get a good effect. You can also put grooves etc into the foam board for decoration.

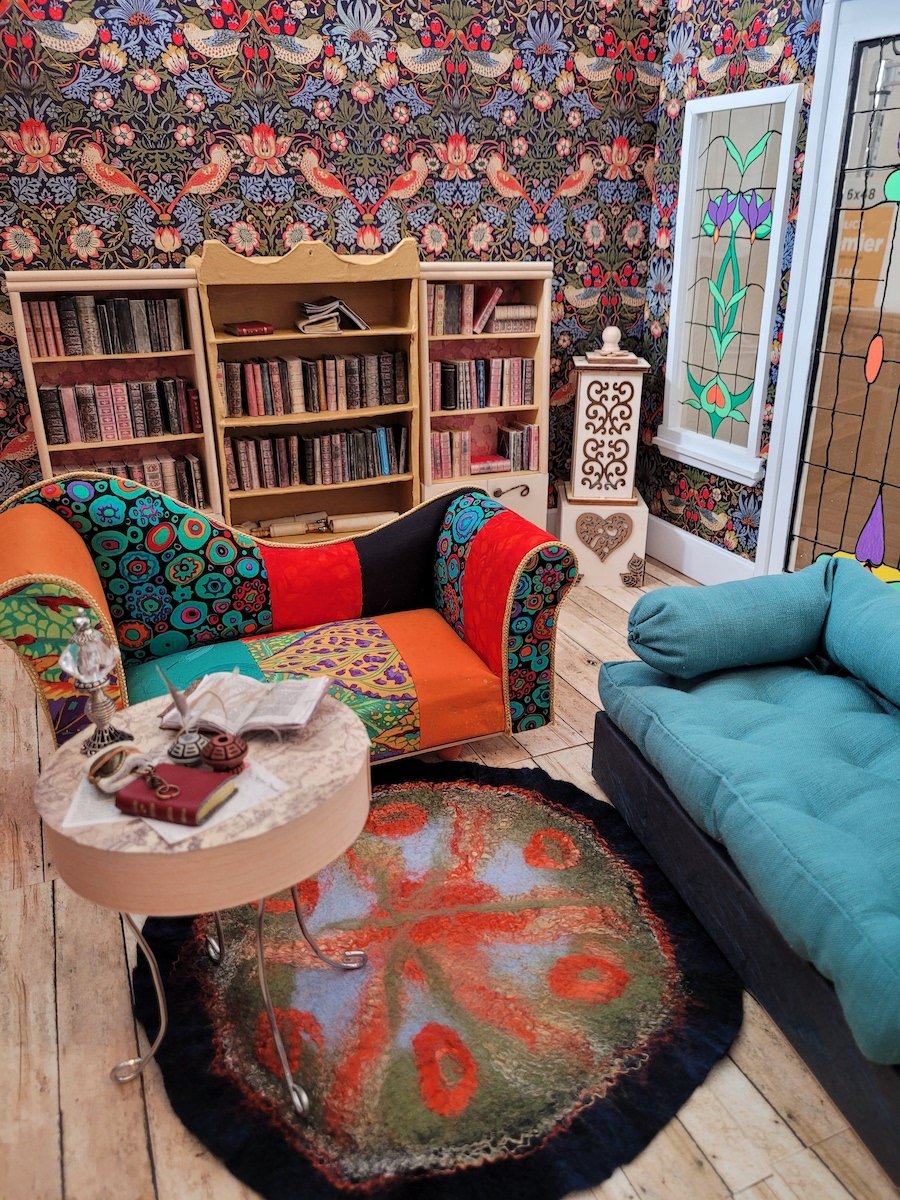
So here are some views of my completed library room. I’m still debating whether to paint the white molding, window frames, etc., cream/off white. But for now it’s done and I think it’s a cosy place to hang out, read, and of course, drink tea.
I think I need more books… back to mini book making!

And now I need a nice garden beyond those windows rather than my messy studio.